 From Santa Cruz, I drove up the twisty highway 9 to Boulder Creek where today you can't tell that this was once the busiest logging town in California. Two billion board feet of redwood was hauled out of these hills by rail car beginning back in the late 1800's. By the 1940's the logging slowed and cabins were built, transforming Boulder Creek into a summer resort and hide out for those living in the bay area.
 Today, there are still a large number of vacation homes, but for the most part the houses and cabins that dot the wooded hillsides are permanent residences. Highway 9 becomes the main street as it straightens out down the center of town, and Boulder Creek Brewing is in one of the old commercial buildings that straddle each side of the two blocks that would be considered downtown. It sort of looks like the 'ol West' except with pavement.
 Boulder Creek Brewing Co. began in 1989 after they bought used equipment from the now defunct Santa Cruz Brewing and Front St. Pub. I found an old site on the web from before Front St. Pub went out of business. Funny, a pint for $1.75. Those were the days. BCBC has gone through a few brewers over the years and I've visited a couple of times to be disappointed in the beers on tap. The main criticism that I've had in the past was the hit and miss quality of the beers, including an imbalance of the hop to malt ratio and a recurring flavor of infection.
I sat down with Matt over a selection of samplers to talk about what brought him to Boulder Creek and about the improvements he's made on their standard line up since he's been here. Matt has been brewing at BCBC since June 2010 and took over as head brewer in September. Previously, while living in Breckenridge, Colorado he began homebrewing to save money on beer while he worked as a river guide before getting a chance to brew commercially with Tony Simmons, head brewer for Pagosa Springs Brewing. They utilize a six barrel system making award winning beers.
Working directly with Tony Simmons at Pagosa Springs gave Matt the experience he needed to take over the seven barrel system at BCBC. I asked Matt what brought him to Boulder Creek and he said that he was doing a beer tasting tour of California starting in Eureka and working his way South. When he got to Boulder Creek he loved the environment and asked the brewer at the time if they needed any help. He found out that the head brewer position was coming up and was hired immediately as assistant in preparation for taking over the brewery. Perfect timing.
Among the population are people who look like prospectors but are most likely the remaining hippies that survived the 60's, giving the town a feeling of rustic practicality and a no-nonsense approach to life. Kind of the way I imagined people were like who logged the redwoods back at the turn of the last century.
 Boulder Creek Brewing Co. began in 1989 after they bought used equipment from the now defunct Santa Cruz Brewing and Front St. Pub. I found an old site on the web from before Front St. Pub went out of business. Funny, a pint for $1.75. Those were the days. BCBC has gone through a few brewers over the years and I've visited a couple of times to be disappointed in the beers on tap. The main criticism that I've had in the past was the hit and miss quality of the beers, including an imbalance of the hop to malt ratio and a recurring flavor of infection.
I sat down with Matt over a selection of samplers to talk about what brought him to Boulder Creek and about the improvements he's made on their standard line up since he's been here. Matt has been brewing at BCBC since June 2010 and took over as head brewer in September. Previously, while living in Breckenridge, Colorado he began homebrewing to save money on beer while he worked as a river guide before getting a chance to brew commercially with Tony Simmons, head brewer for Pagosa Springs Brewing. They utilize a six barrel system making award winning beers.
Working directly with Tony Simmons at Pagosa Springs gave Matt the experience he needed to take over the seven barrel system at BCBC. I asked Matt what brought him to Boulder Creek and he said that he was doing a beer tasting tour of California starting in Eureka and working his way South. When he got to Boulder Creek he loved the environment and asked the brewer at the time if they needed any help. He found out that the head brewer position was coming up and was hired immediately as assistant in preparation for taking over the brewery. Perfect timing.
His first order of business; take the archaic equipment that he inherited that could be described as an over sized homebrew set up and eliminate any potential for infection on the beer. Secondly, modify the recipes for a more complex and well balanced beer. Having brewed at Pagosa Springs Brewing I'm sure he had some good recipe ideas.
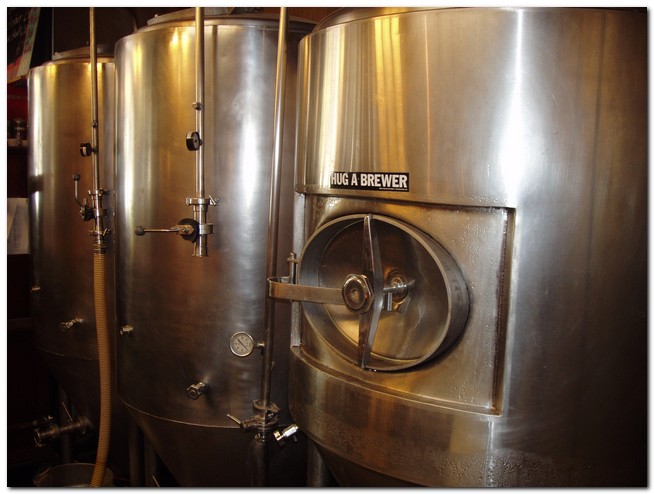
I look in wonder at the system that he has to work with. The mash tun appears precarious in its elevated position above the boil kettle. Containers of milled grain must be manually passed up scaffolding and stirred by hand into the hot liquor. There is an old rusty electric hoist mounted near by but he confided that they just use to lift the lid off the mash tun. A grain auger is in order here but they haven't got the funds, so they make do. The mash efficiency is at 73% due apparently to a faulty grain mill that can't be adjusted. Located in the cramped quarters behind the bar and beside a wobbly antique liquor cabinet, the system looks like that pile of extra screws you have after re-assembling your broken toaster oven. Yet, Matt has managed to overcome the equipment handicap to produce some excellent beers.
 |
| Matt Heber |
I look in wonder at the system that he has to work with. The mash tun appears precarious in its elevated position above the boil kettle. Containers of milled grain must be manually passed up scaffolding and stirred by hand into the hot liquor. There is an old rusty electric hoist mounted near by but he confided that they just use to lift the lid off the mash tun. A grain auger is in order here but they haven't got the funds, so they make do. The mash efficiency is at 73% due apparently to a faulty grain mill that can't be adjusted. Located in the cramped quarters behind the bar and beside a wobbly antique liquor cabinet, the system looks like that pile of extra screws you have after re-assembling your broken toaster oven. Yet, Matt has managed to overcome the equipment handicap to produce some excellent beers.
He brought out a selection of beers to sample and all were delicious. A honey wheat that is dry crisp and brewed with honey from a local farmer, very refreshing. The Rye Pale Ale the is a new recipe he brought in that utilizes 8% rye malt and 50 IBU's. Their flagship beer, the Redwood Ale is an easy drinking favorite of mine and the Dragon's Breath IPA (no one knows who or why this beer is named dragon's breath) that comes in with 70 IBU's and is 7% abv and boasts a large caramel quality to balance the bitterness. A stout with great flavors of cocoa and roasted coffee and malt. When he has the time, a specialty beer like the coconut porter is brewed getting high praise, but for now Matt focuses on keeping up production of the popular fast moving beers, and having enough inventory in stock for supplying the SurfRider Cafe located in downtown Santa Cruz which also serves several of their beers on tap.
I've had some bad experiences in the past at BCBC and it was refreshing to sample a nice group of distinctive full flavored beers that didn't exhibit any off flavors from contamination. Knowing that Matt Heber is brewing in Boulder Creek, it's going to be easy for me to stop in for a pint whenever I get the chance to take the path less traveled and find myself deep in the redwoods of Santa Cruz County.


