During the festivities of Christmas in Mexico, when you are invited into the family homes you'll soon be offered a sweet fruit punch that is traditionally made for this season. The proportions of ingredients that create the flavors of this warm (yes, it's served warm off the stove top) concoction are as individual as the family that prepares it but all have in common the fruit available at this time of year along with piloncillo (sugar) and spices. This tart and sweet drink is served to family members, guests and traveling strangers that may stop by the house during one of the neighborhood Christmas posadas.
 |
| piloncillo |
 |
| guavas |
 |
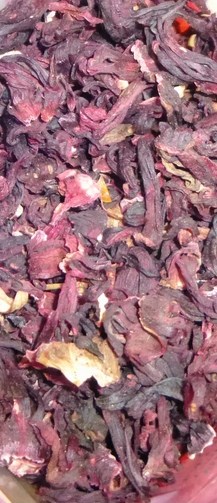
| jamica |
Preparation begins by bringing water to a boil in a large
olla and then introducing all of the ingredients one by one for as long as it takes to adjust the flavors to the cook's taste as the boil continues.
As I was curious about this drink and I just happen to know a Mexican family I asked them if they would share the process of making
punche'. Liz, a friend and a Mexican with some experience making
ponche' offered to help me out with this project. Of course I had ulterior motives. That's right, I can't imagine a delicious beverage not being improved with a little fermentation and so I was on a quest to take the traditional and morph it into the slightly non-traditional with the introduction of Belgian ale yeast. Liz was game and so our mission began.
Here's the fruit we used to prepare what I'm calling the '
Lizmark' (dare I say "
Sinking of the Lizmark"?)
ponche'. Keep in mind that you can add pretty much any fruit you want and there are several that we didn't include in our recipe.
We started with I would guess to be about 12 liters of water and brought it to a boil. I'm guessing 12 liters because Liz doesn't measure anything. It seemed that intuition was more her guide. While the water was heating, she assigned me the task of preparing the fruit by cutting it into bite sized chunks. This included a dozen guavas, several yellow/green apples (not granny smith), a few mango's and a handful of pitted prunes. I tossed all these in as the water began to boil along with two dark colored
piloncillo.
Piloncillo is a raw sugar that is compacted into the shape of a cone about 5" tall and comes in light brown and dark brown. I then peeled about twenty
tamarindo and threw them in without pitting or cutting them up and then I added a fistful of
jamica (what gringos would refer to as dried hibiscus flower). Finally I added five or six long cinnamon sticks and let the whole thing boil vigorously.
 |
| naked tamarindo |
 |
| tamarindo |
Liz tasted my effort and suggested I add more
jamica and a few more
tamarindo to the mix. Because we did this in July we were not able to use any
tejocotes which are only ripe and available during the winter. The t
ejocote fruit are small speckled things about the size of a blemished golfball that grow on a scraggy, spindled shrub-like tree that appears to scream "
I'm going to survive in this harsh environment no matter what!" They are a required ingredient for the real traditionalists imparting another dimension of tartness to the
ponche'. The first person to eat one of these scary looking things was a brave sole indeed. Some say it has a pear/apple flavor. Personally I don't think they're necessary since the
punche' has enough other acidic ingredients in it. My guess is that the importance of including
tejocotes comes from a 'waste-not, want-not' attitude and is more nostalgia than anything else. Plus, what else are you going to do with this weird, unattractive fruit?
The other missing ingredients in our version are pieces of raw sugar cane and maybe some raisins but who's counting?
After Liz was satisfied with the flavor we achieved I turned off the heat and we sat back with a cold Victoria and watched the pot cool. Then we got tired of watching the pot so I took it back to the brewery and transferred the entire content into a sanitized fermentor. I left it to chill naturally over night and returned in the morning and pitched the Belgian yeast. If I recall correctly it was a jar of salvage
Whitelabs WLP500. I figured that the phenolic qualities that this yeast brings to the equation would be a good match with all of the fruity tartness of the punch.
 |
| cinnamon and prune |

I left it to ferment for a week (for those interested, it went from and o.g. of 1.055 down to 1.008 % or about 6% abv.) and then racked it into a 2 liter plastic bottle and forced carbonated. When I transfer the punch out of the fermentor I did this gently as I wanted to leave behind the large quantity of fruit pulp and debris that had settled to the bottom. I set the fairly clear and fully carbonated
ponche' in the coolness of the kegerator to age for a bit.
finished product on ice
One month later, I brought our new baby home wrapped in swaddling ice packs to share with Liz, Antonio and their staff at
The Beer Company. This carbonated, alcoholic version of the traditional
ponche' was a hit. Everyone liked it including me as I enjoyed mine poured over ice. A very nice balance of tart fruit, spice and a sweet but dry finish. I don't care too much for the traditional
ponche' because of the high level of cloying sweetness but after fermenting out some of the sugar this drink is quite satisfying.
My plan is to make a larger batch of this again, but at the brewery come this Winter and have it available on one of the taps at The Beer Company. If you're down here for X-mas stop by for a glass. Salud!


