I ran into a bit of a special needs situation last week, and figured it was worth sharing—not for sympathy, but because this is what I love about homebrewing. No matter how many batches you’ve clocked, something will always go sideways. A missing part, a busted seal, or in this case a completely disgusting bottling bucket. The unexpected shows up, uninvited, and dares you to stay creative.
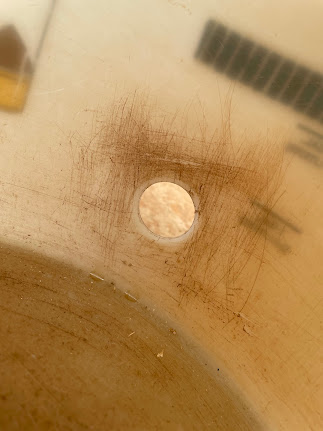
So here's the scene, I'm in my element puttering around the brew cave and I'm needing to bottle a batch of porter. Easy enough—except the only bottling buckets I had looked like they’d been dragged through a gravel lot and left to soak in dirty dishwater for a few years. Discolored, scratched to hell, and definitely not the sterile environment you’d want for your pristine, freshly fermented beer. Unless, of course, you're into doctoring your brew with unknown bacteria strains and suggesting that it's a Belgian such or such.
What to do?
Now, for many of you who've wasted time following this blog know, I normally ferment in garbage cans lined with food-grade plastic bags—sterile, easy to salvage yeast, cheap. Turns out, those same bags are the perfect workaround when your bottling bucket is more biohazard than brewery tool.
Here’s the move: line the nasty bucket with a clean, sanitized bag. That way, your beer never touches the inside of the bucket, and you keep the precious liquid safely quarantined away from those bacteria harboring crevices. But what about the spigot connected to your nasty bucket you may ask? Well, you're still going to use it but you will simply re-install it with the bag in place.
First, prepare yourself. Wash your hands. Like, really wash them and I like to dip them in a solution of acid to be safe to make sure I'm not introducing anything into the bag when I'm installing the spigot.
Drop the bag liner into the bucket, I had to trim off some excess, a couple feet at the top. It was comically tall as my fermenting garbage cans are about 15 gallon compared to this 6 gallon bottling bucket. With bag in place I insert the spigot as normal through the usual hole in the bucket, pushing it through and up against the bag. Then, from the inside of the bag at the point where the threaded part of the spigot pushed up against the bag I pressed on the washer and then threaded on the nut over the bag. This locks the spigot in place and seals the bag tight around it.
Now, with everything snug, I pierced a little hole in the bag at the mouth of the spigot to let the beer flow through. Bottle as usual. Beautiful. The beer stayed protected in its sanitary cocoon while I bottled like usual. When I finished, I dumped the dregs, pulled the spigot, and lifted out the bag—no scrubbing, no sanitizing, no bucket shame. The bucket underneath? Still filthy. Still disgusting but it never touched a drop of beer.
I liked the results so much I’d use this trick even if the bucket was brand new. It’s too easy not to. And in homebrewing, anything that saves you time, cuts out cleanup, and still treats the beer right? That’s my kind of solution.
Cheers.


2 comments:
Beerbag, baby! Love it!
thanks!
Post a Comment